Most people who try to hang a hammock indoors do it backwards. They buy the hammock first, fall for it, then stand in the living room staring at the ceiling and guessing where to drill. That order is exactly why so many indoor hammocks end up in a heap on the carpet with two ragged holes above them and a story about drywall anchors that "should have held."
Learning how to hang a hammock indoors is mostly a geometry problem. A hammock is not a shelf. It does not pull straight down. It pulls down and sideways at the same time, and the load on your ceiling is measured in hundreds of pounds even when the person in it weighs 150. Get the geometry right and a piece of hardware smaller than your palm will hold for a decade. Get it wrong and the toughest hammock on the market goes down with the drywall.
I have been hanging hammocks for twelve years, most of them in western North Carolina where the trees are close and the afternoons are long. Every summer I run a hammock camp and hang twenty plus hammocks for a weekend, and every one of them gets the same treatment. I set the sag, I watch how the fabric behaves overnight, and I decide whether I would actually sleep through the night in it. This is the indoor version of that process, in the order I do it.
Why you should trust me
I am a camping gear reviewer and outdoor educator, and I have slept in more hammocks than beds. My house in Asheville has more hanging points than closets. I have hung cheap parachute nylon that tore on day two, and I have hung premium camping systems with bug nets and rain flies, and I have made every mistake in this article at least once, usually in front of a group of students who never let me forget it.
What I care about is simple. A hammock is a sleep system, not a chair. If it does not hang flat, no fabric quality saves you. If the suspension is wrong, nothing else matters. Indoors, the ceiling is the part you cannot replace with a credit card, which is why the hardware section of this guide comes before the hammock section.
How I picked and how I tested
For an indoor hang there are only two purchases that matter: the suspension hardware and the hammock itself. Everything else, pillows, a spot for your glasses, a reading lamp, is decoration.
I judge hardware on four things. What load it is rated for, whether the hooks and carabiners are actually steel, whether the mounting pieces are included or you have to make a second trip to the store, and whether it works with both a stand and a ceiling. I judge an indoor hammock on how flat it lies, how much the fabric moves overnight, whether the hanging ropes are long enough to reach a sensible ceiling height, and whether it looks like something you want in your living room for the next five years.
The two products below are the ones I point people to for an indoor hang, one for the ceiling side of the job and one for the fabric side. Both are honest about what they are, which is more than I can say for most hammocks sold as a package deal.
The hardware you need before you hang anything
You cannot fix a bad anchor with a good hammock. Do this part first.
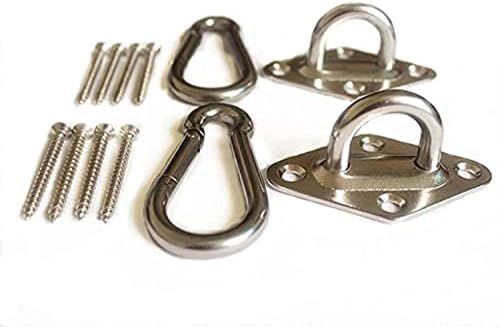
The suspension kit: MHMYDZ 1000 lb Capacity Heavy Duty Hammock Hanging kit Ultra Durable Hooks Carabiners for Hammock Stand Hammocks Swing Chair,Multiple Indoor Outdoor Suspension Ceiling Hooks
 Visit on Amazon →
This is the piece most people skip and then regret. The kit is rated to 1000 pounds, it uses steel hooks and carabiners rather than bent wire, and it is built for exactly the jobs an indoor hang creates: a hammock stand, a swing chair, or a pair of ceiling hooks set into a joist. Check current Amazon price.
Two things to understand about that rating. First, the number describes the hardware, not your ceiling. A hook rated for a thousand pounds will still pull out of drywall if you screw it into drywall. Second, the rating assumes the load is spread across the whole kit, which is why you want a kit with two anchor points instead of one.
Flaws but not dealbreakers: The kit gives you the suspension, not the plan. You still have to find the joists, and you still have to decide how high to mount the anchors. If you want a kit that thinks for you, this is not that kit, and no kit is.
Anyone mounting into exposed ceiling joists, a wooden beam, or a hammock stand frame will get years out of this.
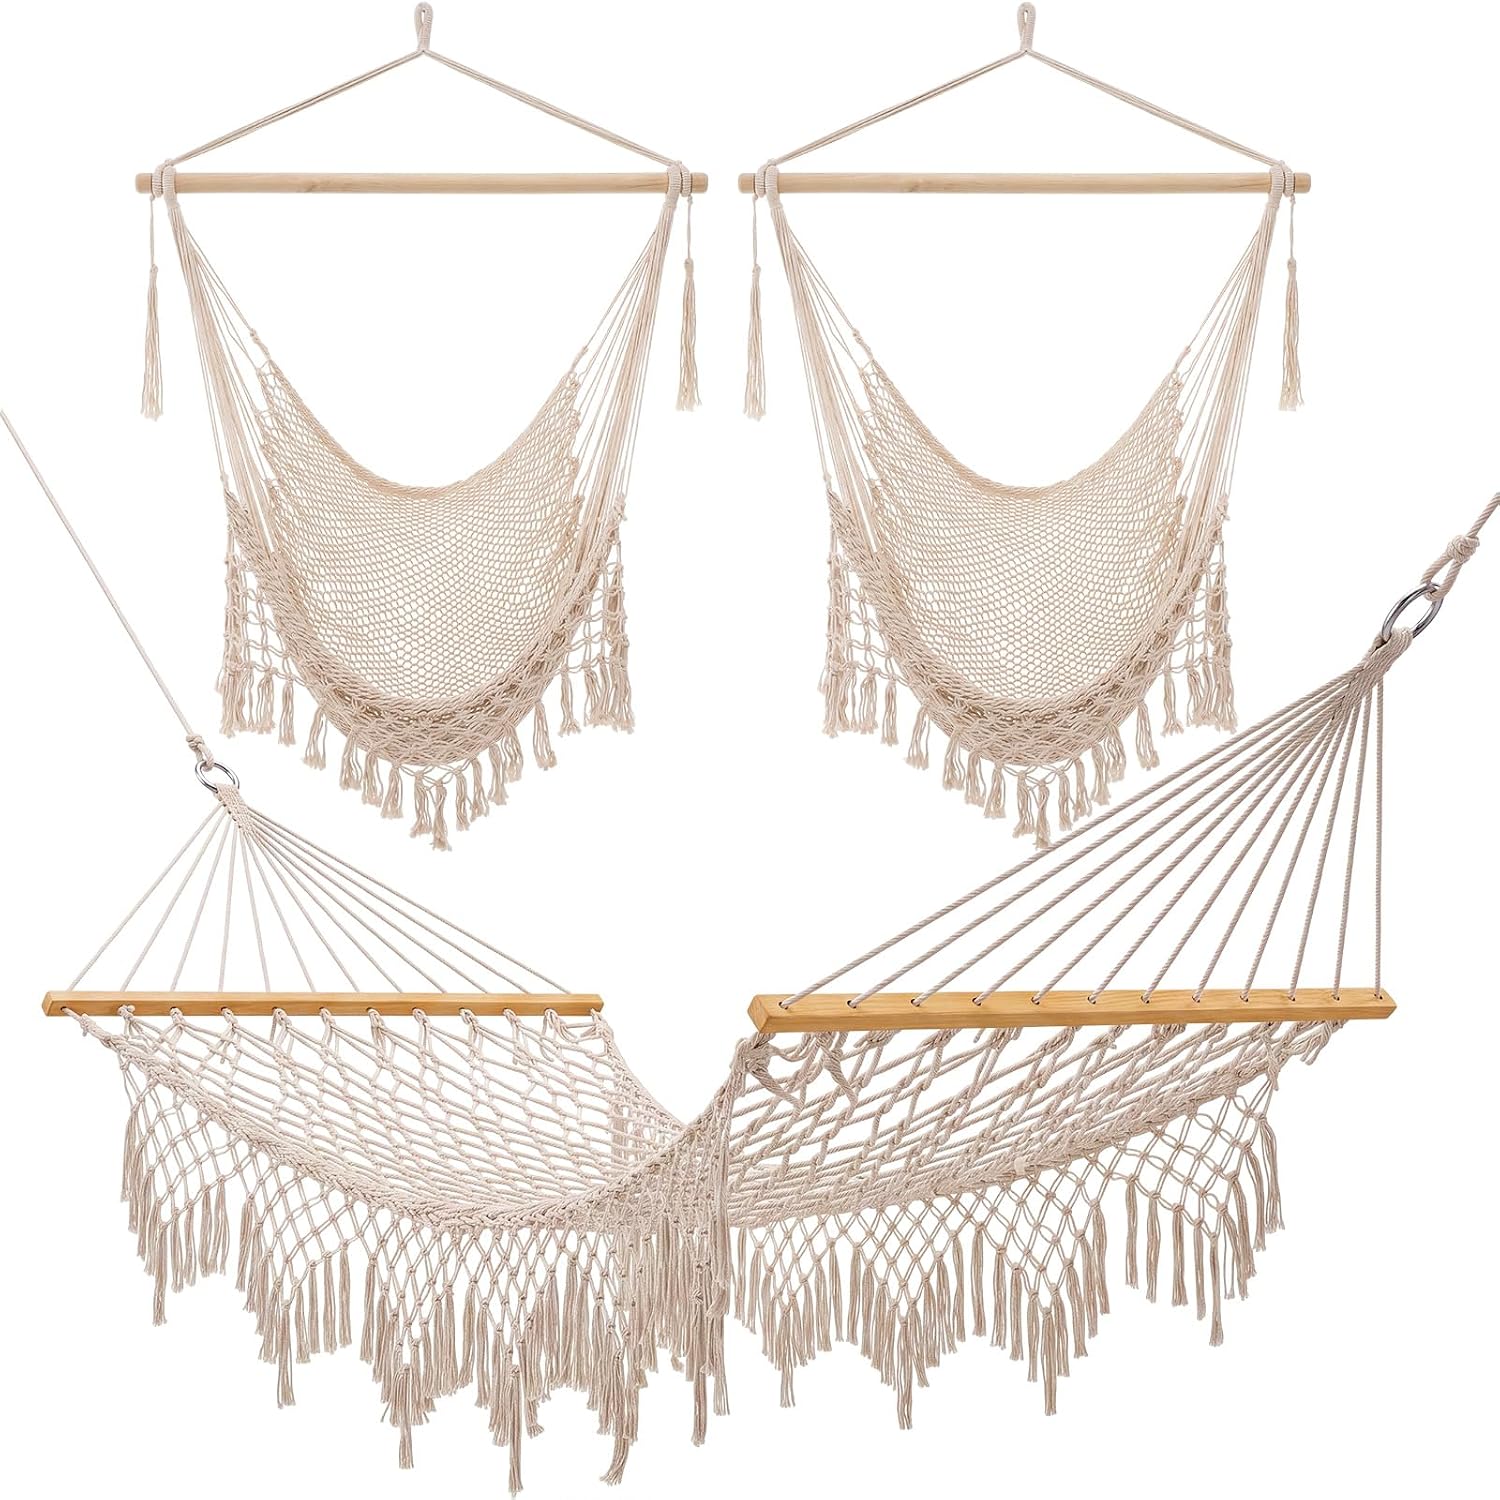
The hammock: 10 ft Beige Macrame Hammock with 2 Pcs Cotton Rope Hanging Swing Chair Tassels Double Woven Rope Hammock with Hanging Ropes Wooden Spreader Bars for Indoor Outdoor Garden Yard Living Room Use
 Visit on Amazon →
This is a ten foot cotton rope hammock with wooden spreader bars, two hanging ropes, and macrame detailing with tassels. It is designed for indoor and outdoor use, which in practice means living room, sunroom, porch, or a covered spot in the yard. Check current Amazon price.
The spreader bars are the reason I would hang this indoors before almost any camping hammock. Bars hold the fabric open, so the hammock lies flatter and wider, and it does not wrap you into a cocoon the way a gathered end hammock does. It also means the hammock reads as furniture instead of gear, which matters when the hang is in the room where you eat dinner.
Cotton rope will stretch a little in the first week and then settle. Plan on raising your anchors or shortening the hang once, and then leaving it alone.
Flaws but not dealbreakers: Cotton and weather do not get along long term. Hang it outside under a roof if you can, and bring it in for the winter. And those included ropes are for a stand or a ceiling joist, never for a tree.
Anyone with a living room, a sunroom, or a covered porch and an afternoon to spare is the right buyer.
The actual hanging workflow
Now the part you came for.
Step one: pick the span before you pick the drill bit. You want roughly eleven to twelve feet between anchor points for a ten foot hammock, with nothing breakable inside that span. Measure the room first. A hammock that fits the wall but not the room is a hammock that swings into a lamp.
Step two: find the joists. Use a stud finder, then confirm with a thin pilot bit. You are looking for the center of the joist, not the edge. Drilling into the edge of a joist splits it. If your ceiling is drywall over strapping with no accessible joists, stop and read the section on alternatives below.
Step three: think about the direction of pull. A ceiling joist is engineered to carry weight from above, not a person swinging below it. The flatter you hang the hammock, the more the load becomes a straight downward pull, and the more you are asking the joist to do something it was not designed for. A proper 30 degree hang keeps more of that force running sideways along the joist, where the structure is strong.
Step four: mount the anchors at the right height. For a seated hang, six to seven feet off the floor is the usual starting point. Higher anchors let you keep the hammock off the ground with a flatter, more comfortable lie. If you are hanging near a wall, leave at least a foot of clearance so the hammock does not rub.
Step five: hang it, then set the sag. Clip the hammock in and sit down before you commit. The suspension line should sit at about 30 degrees from horizontal. That is the number that gives you a flat lie instead of a banana curve.
Step six: load it slowly the first time. Sit, then lean back, then lie down. Listen for creaks and watch the anchor points. If a hook moves in the wood, stop and redo it. Hardware should not shift under load, ever.
Step seven: give it a night. The best test of a hang is not the first ten minutes. It is whether you are still comfortable at 3 AM. If you wake up sliding toward the middle or fighting the fabric, your sag is wrong, not your hammock.
Sag, height, and the 30 degree rule
Sag is the dip angle of the hanging hammock, and 30 degrees is the sweet spot. Hang it flatter than that and the tension climbs fast, which is hard on anchors and makes the hammock twitchy and tippy. Hang it deeper and you get the banana, where your knees and head ride higher than your hips and your lower back pays for it by morning.
The fix for a hammock that sags too deep is not to shorten the hammock. It is to raise the anchor points, or spread them further apart. Move the anchors, not the fabric.
Spreader bar hammocks need a little less fuss than gathered end hammocks. The bars hold the shape, so you have a wider window of angles that still feels good. Start at 30 degrees anyway. It is the number that has kept people sleeping through the night for a century.
Where rope belongs, and where it does not
Included rope is my least favorite thing in the hammock industry, and I will explain the exception. Around a tree, rope is a problem. Thin cord bites into bark, and two inch straps spread the same load across a surface a tree can actually heal around. If you are hanging between two trees, use straps, always, no matter what came in the box.
Indoors, the rule changes. There is no living bark to damage, so the ropes that come with a macrame hammock are fine, as long as they run to a stand or to hardware anchored in a joist. What you should not do is wrap rope around a joist and call it a day. Rope chafes, it creeps, and it hides the fact that you never actually checked what you were hanging from.
Common mistakes
Anchoring into drywall. Drywall holds a picture frame. It does not hold a person.
Hanging from a ceiling fan box. That box is rated for a fan, and a fan does not swing.
Hanging too low. If your backside touches the floor when you sit down, the hammock is too low, and no amount of pillow engineering fixes it.
Assuming the rating on the box covers the whole system. It covers the hardware. Your ceiling, your joists, and your installation are the rest of the system.
Trusting the first ten minutes. A hammock that feels fine for ten minutes can be a misery by two in the morning. Test it like you mean it.
When an indoor hang is the wrong answer
If you rent and cannot put holes in anything, a hammock stand is the honest solution, and the suspension kit above works with most of them. If your ceiling is concrete, or you have radiant heat in the ceiling, hire someone who knows the structure before you drill. If you want the hammock in a room with no span long enough, a chair style hammock that hangs from a single point is a better fit than a ten footer.
And if your real plan is camping, none of this replaces a proper trail setup with wide straps, a structural ridgeline, and a rain fly. Indoor hangs and trail hangs are different problems, and the gear is different too.
What this all costs
The suspension is the cheapest part of the project by a wide margin, and it is the part that keeps you off the floor. The hammock is the bigger spend and the part you will look at every day. Check current Amazon price on the kit and check current Amazon price on the hammock before you commit, because both move around.
The math that matters is not the purchase price. It is the cost per afternoon. A hammock you actually hang is one of the few pieces of furniture that pays you back in cancelled plans. Mine has cost me more evenings than any streaming subscription I have ever bought.
Hang the hardware first. Set the sag at 30 degrees. Then let the afternoon go.